Sunday 29 May 2011

K-9 Mail 3.801 the Best Email Client for Android

K-9 is the best email client for Android has released the new version. This new version offer the best way to manage your all mail accounts in single app in your Android smartphone. .

It's incredibly powerful and 100% free K-9 Mail is an open-source e-mail client with search, IMAP push email, multi-folder sync, flagging, filing, signatures, bcc-self, PGP, mail on SD & more! K-9 supports IMAP, POP3 and Exchange 2003/ 2007 (with WebDAV).

Download Free K-9 Mail Client v 3.801 for Android:
K-9 Mail v3.801.apk (1.99 MB)

Download Collection of Photohop Killer Tips Video Tutorials

This is a great collection of the coolest Adobe Photoshop tips, timesaving shortcuts, workarounds, and  undocumented tricks. With the help of these Video Tutorials and tricks you can make your work in photoshop very easy and like a export. This availabel in 7 parts for easy download. You must download all parts.


Free Download Links for Photoshop Killer Tips 2009:
Source: Rapidshare 

Size: 634MB 
Format: MP4+FLV 
Total Files: 142 Files 
Download Here: 
http://rapidshare.com/files/360723084/PhotoshopKillerTips_2009.part1.rar
http://rapidshare.com/files/360728200/PhotoshopKillerTips_2009.part2.rar
http://rapidshare.com/files/360733981/PhotoshopKillerTips_2009.part3.rar
http://rapidshare.com/files/360740679/PhotoshopKillerTips_2009.part4.rar
http://rapidshare.com/files/360746062/PhotoshopKillerTips_2009.part5.rar
http://rapidshare.com/files/360750963/PhotoshopKillerTips_2009.part6.rar
http://rapidshare.com/files/360754059/PhotoshopKillerTips_2009.part7.rar

Free Live T.v On your Mobile

Live TV On Go! 

Working on 2G, 3G and Wi-Fi

--General Indian Channels--

--Music Channels--

--Sports Channels--

--Cartoon Channels--

--News Channels (Local and International)--

--Other Channels--


--Disclaimer--
The Channels in this app are streaming direct from different public sites that are not owned by me.

The SmartPhone Made from Flexible Paper

The future is more smart and flexible! The new Paper Phone prototype shown off  the future of mobile devices. New Paper Phone created by research teams at Queen’s University in Canada and Arizona State University. Its a 9.5-centimeter (diagonal) screen is actually a lightweight flexible display and feel similar to a bendable piece of plastic. It does everything a smartphone does.


The Paper Phone is best described as a flexible iPhone. The Paper Phone can store books, play music or make phone calls and being able to store and interact with documents on larger versions of these light, flexible computers means offices will no longer require paper or printers. It uses an E-Ink display and works by bending the phone into different positions to make calls, use apps, and listen to music. When you want to make a call you simply bend the device's surface and squeeze the appropriate symbols.
According to creator roel vertegaal, the director of queen’s university human media lab, "This is the future. everything is going to look and feel like this within five years. this computer looks, feels and operates like a small sheet of interactive paper. you interact with it by bending it into a cell phone, flipping the corner to turn pages, or writing on it with a pen. We don’t see any camera as of yet, so it’s missing a feature that’s extremely popular with smartphones, but we know it’s in the early stages, so that could be added in the future.”

In Paper Phone you can chooses the shape for each function. For example, you can choose to bend the upper-right corner to make a call, or bend the lower left to listen to music. These shapes are then recorded into the software, and when repeated, they send the appropriate action to the device.

Dr. vertegaal will unveil his paper computer on may 10 at 2 pm at the association of computing machinery’s chi 2011 (computer human interaction) conference in vancouver — the premier international conference of human-computer interaction.
Here Video of Paper Phone: go to
http://www.youtube.com/watch?v=Rl-qygUEE2c&feature=player_embedded

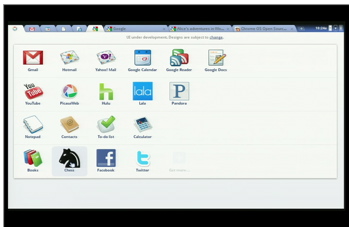
Google Has Plan to Bring Chrome OS For Desktop

Google says its also working on a Chrome OS version for desktop. Google recently announce to launch Chrome OS for notebooks this summer and this will comes with a series of notebooks (Chromebooks) developed by Acer and Samsung. Google wants to bring operating system for desktop systems as it said at the Google I/O developer summit.

First Google will launch Chrome OS for notebook which designed to be used as a fast booting OS for low-power notebooks and with two netbook designs from Samsung and Acer. It has a very low hardware requirements and can run on any system without any performance drop and same time it'll give the fast boost times. The Chrome OS netbooks built by both Samsung and Acer are powered by an Intel Atom N570 processor, which packs two computing cores running at 1.66GHz. The Intel CPU is paired together with 2GB of system memory and Samsung's Series 5 netbooks also feature a 16GB SSD as well as a 12-inch LED backlit screen. The netbooks will be available around June 15 in US, UK, Germany, Netherlands, Spain.

And now Google also plans to develop a “Chromebox” desktop which will be primarily targeted at the enterprise market, where users may require multiple displays. Though Google hasn't yet unveiled any information about the launch date of “Chromebox” desktop and pricing details.

Saturday 28 May 2011

Password Protect Pen Drives with USB Secure 1.5.8 Full with Serial Key

Here the latest version of USB Secure 1.5.8 released. USB Secure is a great tool to password protect USB drives and all other portable media so that no one can access your data even if they are lost or stolen. Protection is PC independent, doesn't require installation and doesn't require administrator rights at the other end. Never again worry about lost or stolen USB drives if you have protected it with USB Secure. USB Secure works with all types of portable media like USB Flash drives, Thumb drives, Memory sticks, External drives and Memory Cards.

The Main Features in USB Secure:
Portable
• Take your secure USB drive anywhere
• Plug in to any PC and it will run
• No Administrator rights are needed
• Protection is PC independent
Theft Proof
• Password protect USB drive data
• Don't worry about lost USB drives
• Stolen USB drives are not a problem
• Misplaced USB drives? No worries!
Leak Proof
• Data is leak proof
• Take your documents with you
• Business plans go nowhere
• Financial documents stay with you
Loss Proof
• Inaccessible data without password
• Can't be lost or deleted
• Can't be tampered with easily
• Ideal to keep a secure backup copy
Plug & Play
• Supports Autoplay feature
• Setup detects all devices attached
• Runs automatically on drive access
• Autoplay for protecting & unprotecting
Fast
• Fast and reliable
• PC Independent protection
• Quickly protect data
• Takes seconds to protect GBs of data

USB Secure helps you password protect USB drive, thumb drive, memory stick, pen drive, jump drive, flash drive and external hard drive. It supports plug and play and runs automatically once a USB drive is plugged in, asking you the password for it. USB Secure is hassle free and it doesn’t need a rocket scientist to master.

USB drives are the most popular way to move data from one PC to another. They are small in size but can carry gigabytes of data. They are easy to use, convenient, affordable, but at the same time they pose a security risk and can be easily lost, stolen or misplaced. A secure USB drive i.e., a password protected USB drive is a must these days as the data that it contains may cost you millions of dollars if stolen or lost.

You can easily lock USB drives with USB Secure and can also password protect memory sticks and all other external storage devices with just a single mouse click. An easy to use setup program will guide you to put the program on your USB drive. It can automatically detect all such drives currently plugged into your PC. After installing simply run the software, set and confirm a password, protect USB drive and sit back and relax!

It’s not necessary to run the software every time you want to protect USB drive; you can simply choose ‘Protect This USB Drive’ option from the Windows Autoplay that pops up every time you plug-in your USB drive. You can also double click the USB drive in your PC to launch the program. To unprotect your secure USB drive, click 'Unprotect' and enter correct password to access your data again.

Another great feature of USB Secure is that it doesn’t require any Administrator rights to run and therefore there is no need to install it at the other end to retrieve the password protected data. The program also supports plug & play and asks for a password immediately when the drive is plugged-in. Password protect USB drive and other portable media with USB Secure.

Download to Password Protect Pen Drives with USB Secure 1.5.8 Full with Serial Key:
USB Secure 1.5.8 Full with Key.rar (1.33 MB)

HTC Evo 4G : HTC Introduces World's 1st 4G Mobile Phone

HTC's released Evo 4G, the world's first 4G mobile phone when it comes out. This phone comes with a new and experimental multi-network technology will allow the phone to make seamless voice calls while simultaneously accessing the internet at high-speed. The HTC Evo 4G is a CDMA phone, operating on CDMA 1X, EV-DO and WiMAX; where CDMA 1X is the Voice Carrier, and EV-DO and WiMAX technology will be used for Data Communication.

The HTC Evo 4G operates on Qualcomm's QSD8650 Snapdragon processor at 1GHz and the OS is Nexus One. The volume of operative RAM i.e. 512MB is also as same as that of the Nexus One. The HTC Evo 4G is one of the rare mobiles at this point in time to feature the Android 2.1 platform; and add that to HTC's capacitive multi-touch Sense UI, the Evo 4G makes for a superbly usable device. The screen size is pretty huge for a mobile phone, that 4.3-inch TFT LCD will display a resolution of only 800x480 pixels. HTC Evo 4G a touch only device as its lack of a QWERTY keypad. 
This phone has an HDMI port to hook it to an HDTV, a must have feature for a smartphone nowadays. This will surely boost your multimedia appetite. You can also use the Evo 4G with its kickstand for a fully handsfree high-res video experience. The main camera is a 8MP imaging device with 720p video recording ability and a powerful LED flash, while the secondary camera is a front facing 1.3MP device.
The internal storage is only 1GB, the package comes with an 8GB microSD card - which still leaves you with not too much to spare. The phone's WiFi connectivity is an overstatement in the present day and age, when it is not able to handle the 802.11n standard. The market release of HTC Evo 4G anytime this summer, though not sure about expected price yet.

How to Get Original Stored Passwords from Your Browsers

BrowserPasswordDecryptor is a free software to instantly recover website login passwords stored by all popular web browsers. All of these web browsers offer the feature store the login passwords so that user don't have to remember and enter the password every time. Each of these use their own local storage format and proprietary encryption mechanism to store the login passwords. This utility is very helpful in case you forget password and need to show that stored password.

BrowserPasswordDecryptor is not a hacking tool but you can use it to get password in any PC as it can recover only your stored passwords. BrowserPasswordDecryptor automatically crawls through each of these browsers and instantly recovers all of the stored website login passwords. Browser Password Decryptor presents both GUI interface as well as command line version, the later is more helpful for Penetration testers in their work. Apart from normal users who can use it to recover their lost password, it can come in handy for Forensic officials who can get hold of any stored website passwords by various browsers.
This support all popular browsers like Firefox, Google Chrome, Opera and IE. If you forget passwords for your any of online accounts then the best way to recover those passwords is to view stored passwords in browser settings. The application is extremely easy to use and it provides a single windowed interface to work with. Here how it work:

~ Launch BrowserPasswordDecryptor on your system
~ Next click on 'Start Recovery' button and all website login passwords stored by web browsers will be recovered & displayed as shown in screenshot 1 below.
~ By default passwords are not shown for security reasons as it is sensitive data. However you can click on'Show Password' button at the bottom to view these passwords.
~ Finally you can save all recovered password list to HTML file by clicking on 'Export to HTML' button respectively.

Here are the highlights of top features of BrowserPasswordDecryptor:
~ Instantly decrypt and recover stored encrypted passwords from popular web browsers.
~ Comes with both GUI interface as well as Command-line version.
~ Recover password of any length and complexity.
~ Automatically discovers all supported Applications and recovers all the stored passwords.
~ Sort feature to arrange the recovered passwords in various order to make it easier to search through 100's of entries.
~ Save the recovered password list to HTML file for transferring to other system or for future use.
~ Easier and faster to use with its enhanced user friendly GUI interface.
~ Installed tool is completely Portable which can be directly run on second system
~ Support for local Installation and uninstallation of the software.


BrowserPasswordDecryptor works on most of the Windows platforms starting from Windows XP, 2003, Vista, Win7.


Download Free BrowserPasswordDecryptor 1.0 Web Browser Password Recovery Tool:

Remote Web Desktop: Remotely Manage Android Phone Anywhere in Web Browser

A best app to manage your phone in desktop browser and use it for Messaging, File Explorer, Shared Clipboard, Wallpaper, WiFi Keyboard, Screen Capture, FTP Explorer, WebCam, Contacts, Notes and also can manage Mobile Settings. The easiest way to remotely manage your phone in web browser, Anytime, Anywhere without need to of anything special.


Features in Remote Web Desktop:
1. Web SMS: provide an outlook similar interface to send, read, and manage your messages. Support long SMS, mass-sending, and fake SMS.
2. File Explorer: manage SD card files and transfer files between phone and computer. Support multiple upload by drag-and-drop (for HTML 5 browser), image viewer, Media Player, etc.
3. FTP Server: provide a high speed channel to transfer files between phone and computer, enable you to manage sdcard files in Windows File Explorer, browser or FTP client.
4. WiFi Keyboard: allow you to type on your phone using your computer's keyboard.
5. Shared Clipboard: share clipboard text between PC and phone.
6. Webcam: turns your phone into a wireless camera, view your camera with web browser (For 2.2+)
7. Screen Capture: capture phone screen from web (for rooted phone)
8. Wallpaper: set phone wallpaper by upload a picture or online picture.
9. APK Web Installer: backup apps to SD card, and install APK through File Explorer of web desktop.
10. Personal Web Server: serve your personal web pages on your phone.
11. SSL HTTP: provide 512 bits RSA encrypt
12. Network Bridge: support all ineternet connections (2G/3G/WiFi), access your phone at any place.

Download Free Remote Web Desktop 5.2.1 for Android:
Remote Web Desktop 5.2.1.apk (2.12 MB)

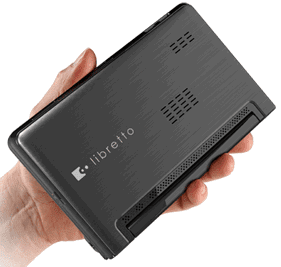
Libretto® W100 Dual Touch-Screen Laptop from Toshiba

Toshiba has unveiled a new dual-screen, touch-screen mini laptop Libretto® W100. The Libretto W100 runs Microsoft's Windows 7 operating system, and has two 7in, LED-backlit touch-screens. The new libretto® W100 ultra mobile PC multiplies your possibilities by offering dual 7” diagonal multi-touch screens that work horizontally or vertically—perfect for ebooks or enjoying movies, music, photos, surfing the internet, sending and receiving emails and keeping up to speed with social networking sites on the move. The main features are:

Breakthrough Portability: Weighing in at under two pounds, the durable clamshell design of the libretto® PC makes even the lightest laptops seem heavy. Engineered for the ultimate in carrying comfort and handheld performance, it’s equipped with a spacious solid state drive for storing and sharing your files, along with music, photos and clips. And it’s encased in a black metallic finish.

Wireless Freedom: Carry the libretto® W100 PC and you’re done with wires. Wireless-N puts you in touch from any hotspot. A built-in webcam empowers you to chat face-to-face all over the place. And integrated Bluetooth® v2.1 lets you lose the cords when using headphones, speakers or a mouse.

Seamless Synchronization: This PC definitely plays well with others. Driven by Windows® 7, it lets you easily share, stream and synchronize your files and multimedia through your home network or cloud. It also comes with a USB port and built-in memory reader so you can transfer stuff to and from external hard drives and other popular gear.

Go-Anywhere Windows® 7 Performance: This ultra mobile PC is small, but never shrinks from the task at hand. Powered by Windows® 7 Home Premium, it offers familiar navigation and full multimedia capabilities. So now you can enjoy many different things—games, ebooks, movies, music and TV—from a single device. Perfect for multi-tasking, it also comes with an energy-efficient Intel® Pentium™ processor that lets you keep on doing and enjoying, wherever you’re going.

Toshiba also unveiled two other new laptops, the Portege R700 and AC100. The R700 is a lightweight laptop with a 13in screen, which uses a new cooling system to ensure it doesn't overheat, while the AC100 is only 14mm thick and runs Google's Android operating system. Toshiba said it could boot up in less than a second, allowing users to get online quickly and easily. All three new laptops will go on sale next month. Toshiba has not yet confirmed pricing details for any of the devices.


Thursday 26 May 2011

Dolphin Browser HD v5.0 Public Beta2 Available for Download


Dolphin Browser has just announced that a new version of the application Dolphin Browser HD v5.0 beta2. After a private beta, an improve Dolphin Browser HD v5.0 beta 2 available for all users. The new version features a fresh UI changes, speed dial style new tab, Powerful bookmarks sidebar and faster browsing experience and more stable performance.

Here the details of Dolphin Browser HD v5.0 beta2:
Brand new design of Bookmark side bar bottom; change Quick Menu Display Change items in Quick Menu: remove Downloads, and change to Settings. ~Innovative UI changes: fresh tab color; more elegant and more modern settings interface, fantastic fluorescein effect of context menu.

~Speed dial style new tab: access your favorite site easily, undo your previously closed tabs, and tell your most visited sites history at a glance.
~Powerful bookmarks sidebar: Bookmarks, History and Most visited all listed,  quick menu to access feature settings.
~Sub-folder supported:
~Faster browsing experience and more stable performance: The Dolphin Browser HD v5.0 private beta is very unstable. However, this ver have fixed many random crash problems in this public beta version. Also, both launching speed and browsing speed get  optimized in this public beta version.

According to them, "All above are the general changes in Dolphin Browser HD v5.0 beta1, how do you think of them? We have prepared a short questionnaire. Hope you can tell your thoughts on Dolphin Browser HD v5.0 beta1 to us. Thanks for your cooperation!"

“No matter your suggestions or bug reports, all inspire and encourage us to improve Dolphin Browser HD v5.0 better. For all other users, we also thank you for your appreciation of Dolphin Browser HD. Now we are glad to share with you all the new changes in Dolphin Browser HD v5.0 beta,” the company notes.

Download Dolphin Browser HD v5.0 beta2:
Dolphin Browser HD v5.0 beta2.apk (2.1 MB)

(If asked for password, enter the password:-  onlytrick )


Symbian Mobile Tips and Tricks

Here some free tips and tricks for Symbian mobile phones. With these secrets you can boost up your mobile phone.

Firstly have some extra ordinary Tricks:

How to reset The Operator Logo?

1) Go to the following dir :
C:\System\Apps\Phone\Oplogo
2) Delete any file in this directory
3) Restart the phone

How to copy & paste text:
Press and hold the pencil key and select your text using the scroll key.

Left function key will change to 'Copy'. Press it to copy the selected text to clipboard.

You can paste the clipboard contents the same way:

press and hold the pencil key and press 'Paste'. Or, press pencil key once and select 'Paste'

Retrieve lost MMC password:
1. Open file explorer. (SeleQ, FExplore, AppMan) 2. Search for 'MMCSTORE' 3. When you find it, send it to your PC 4. On PC, open the file with Notepad, or any word processor 5. there goes your password!

Repairing A Corruptted MMC:

Physically, memory cards are quite fragile pieces of high technology, susceptible to damage from various silly things like excessive heat, condensation, strong magnetic fields, physical damage from rough handling and/or bending! (similar to most electronic devices then..)

Given the natue of mobile memory card products, they are constantly being taken in and out of some form of interface with a mobile phone, a camera, a laptop, or desktop PC, or a separate memory card reader. The number of different devices they have to be able to interact with is in the thousands.

It is not too surprisingly, then that sometimes the state of the file system on the memory card can get damaged.

This may happen for a number of different reasons, including:

* removing the card from a device whilst an application is trying to read/write to it.. (Just be patient...)

* battery drain on a device whilst in use meaning an insufficent voltage failure whilst writing to the card.

* a poor implementation of the MMC standard on the device using the card

* poor connectivity software drivers on the device or the Windows PC/Mac

* physical damage like card or device being dropped, bent, getting wet etc...


As often as not, the problem is not terminal for your memory card, but just a software issue ( or in physical terms, it could be called "a temporary disalignment of the all the bits and bytes on the card").

The fix for this problem is the same as for any other file storage device (like a floppy or hard drive) with corrupt or invalid file system, namely; re-format the file system.

Re-Formatting your MMC Card:

It is possible that your mobile will offer you the option of formatting the memory card if it is found to be invalid. (However, the likes of Nokia nGage, Nokia 6600, and Siemens Sx1 often just prefer to reject the media as corrupted).

In that case, to format the card, you will need access to one or more of the following:

* A Windows PC or Mac.

* A separate multi-format memory card reader (verify that it is compatible with the MultiMediaCard -MMC- standard).

* (This can come in USB or PCMCIA flavours. If USB, try and ensutre it is a USB2 device.

* Alternatively, many of the newest laptop and desktop PCs now come with integrated Multi-format memory card readers.

* If you are using a separate memory card reader, then connect it up to your PC, and let windows recgnize the device through plug-and-play.

Now you can insert your MobyMemory card into the appropriate slot in the memory card reader. (Please note that because the MMC card is pretty much symmetrical it is very easy to insert it upside-down in the slot).

Open up [Windows Explorer] (or the equivalent for MAC users..sorry not well-versed in OS X).

There should be at least one icon visible for a [Removable Drive] in the list of available drives. (in fact, there is often a list of about 5 or 6 Removable drives, one for each of the different Memory card formats that your reader is compatible with).

Find the drive that is mapped to the MMC card by clicking on each in turn until it confirms there is a drive present. (Sometimes it is easiest to do this by trying a fully-functional MMC card in the MMC slot first so you can confirm which drive letter it is.)

(NB. It will always be labelled as a [Removable Drive], don't mistake it for one of your PC hard drives like [C:] drive, as that could be catastrophic later on!)

At this stage it may give an error message saying that the drive is unreadable.

By right-clicking on the drive letter, it will provide the option of formatting the drive.

Select format the drive, and the [Format Drive] dialog will appear (Double-check again to make sure it not your [C:] drive!).

There is only one setting to focus on in this page, and that is to ensure that the FileSystem selected for formatting is the [FAT] option (not FAT32, or NTFS or any other option)

(Note: All mobile phones, to my knowledge, and most cameras (etc..) use the FAT file system (or at least are compatible with it) on their memory card media.)

Now click on Format Now ( ensure [Quick Format] is not selected as this will not actually restore the file system space byte by byte, but only resets the header information so the drive thinks its empty again. This may not be enought to solve your corruption problem.)

The PC will now - hopefully!- chug away happily until it has restored the memory card space back to its original configuration (of course, any information on there is long gone by now!).

If you recieve an error message back from the [Format Now] request, then your problem may be more permanent, and not just a software issue. In this case, it may still respond to a format request in a different memory card reader or device.

If you believe it to be a failure of manufacture, then the warranty on the card offers the prospect of a replacement card, subject to a confirmation of the fault upon return of the goods.

Increase Your MMC Space

Your files in MMC are stored in multiple (disk) blocks.

So if you format using 16K block, the space used will be 16K eventhough your file is just 1K.

If you buy MMC, it is usually preformatted with 16K block. Therefore alot of space is wasted as most installed program files are usually less than 2K.

You will need a card reader to do this:-

1. Connect card reader and copy all your files in the MMC to computer disk. (Make sure you set the show all/hidden/os files to "on")

2. Do a format of the MMC using command line "format" and use the /A=size option.


Alternative, you can use the Disk Management in Adminstrative Tools to format. Make sure you select FAT. For 256MB MMC, smallest block you can use is 4K, 128MB is 2K, 64Mb is 1K and 32MB is 512B.

(Note: You cannot use the phone "format MMC" to do this as the format just clear the allocation table and does not change the block size)

3. Copy back all files to MMC.

Now you will find that you will have more space. 256mb MMC got back 30+ mbs

Speed Up Your Phone:
First go to your To-do List (default app of your Phone)

- Make a note and input as follows
Subject: Speed
Due Date: 01-29-2005(mm-dd-yy)
Priority: set to High
then press Done

- Make a second Note and input as follows

Subject: Qoukie
Due Date: 01-29-2005(mm-dd-yy)
Priority: set to Low
then press Done

- Do not exit yet, Press the Option of your Subject note w/c is Speed and Mark as done

- then Press the Option of your Subject note w/c is Qoukie and Mark as done

- Now, reboot your mobile.

Handy Tips:
- At the top of the main-menu and every folder, the keys 1 to 9 are shortcuts to the icons 1-9

- A shortcut on the left menukey in standby-mode will take more time to open than a shortcut on the right menukey. Reason: The left key is also used for the keylock so it shortly waits for pressing the * button.

- While writing text press and hold "#" to switch between Alpha mode and Number mode. You can also press a key long to insert its number.

- In standby-mode, press and hold 0 to launch your wap home page.

- If you have your keylock activated just press the on/off button to turn on your backlight to look at the time when it's dark without having to unlock the keypad.

- To keep the backlight on, run Torch (freeware), press and hold the Menu button and go somewhere else on the phone.

- To check your current firmware version simply type *#0000# in standby screen.

- To check your IMEI (International Mobile Equipment Identity) type *#06# in standby screen.

- To check your Bluetooth device address type *#2820# in standby screen.

- Start up in Safe Mode (no 'auto start' apps will be running): Hold down the pencil key when you turn on the phone and hold it on until you have to enter your PIN code.

- Format the phone memory by typing *#7370# in standby screen.

- In standby mode,
45# + dials the number on your sim in memory slot 45.
50# + dials slot 50 and so on.
Edit/Delete Message

Now more questions and queries about Symbian OS phones:
Tip 1 : Do u know how to use the edit button (abc or pencil button)?
Heres how... in the inbox for example; u wanna delete multiple sms, simply hold the edit button, scroll down, and then, press c to delete the marked sms. The edit button can also b used to copy and past text in sms, simply hold it and scroll across, choose copy. pretty good for placing song names in ngages
Tip 2 : Shit happens, on a smartphone, its inevitable u do something wrong, and tis calls for a format of fone. to format the fone, press *#7370#, then enter the lock code, which is the sec code of the fone. NOTE: batt must b full, else if format is disrupted by low batt, consequences will b disatrous
I heard the code *#7780# works too, pretty much the same i tink.
for 6600 users, to format the fone, theres an alternative way. Press and hold <3>, <*>, and the buttons, then power on fone, keep holding on the 3 buttons, till u come to a format screen. tis method ONLY works on 6600, and need not enter the sec code. BUT sec code wun be reset to default 12345.
Tip 3 : TO NGAGE USERS; Did u know u can install .sis files simply using the cable given? Juz plug it in, place the .sis file anywhere on e: (the mmc), not in any folders, root of e:, disconnect, then look for it in manager.
Tip 4: Save on battery and system memory being used by regulary checking the task manager which can be accessed by holding down the menu button!!
Tip 5: Type *#06# to display your IMEI serial number, very valuable for the unlocking your phone to other sim cards
Tip 6: Type *#0000# to view which firmware version you are running
Tip 4a: Set the screen saver to a short time out period to prolong battery life.
Tip 4b: Avoid restarting the phone, or repeatedly turning it on and off. This helps increase battery life.
Tip 7: If you would like to avoid being "blue jacked", keep bluetooth turned off, or set your phone's visibility to hidden.
Tip 8: Don't want to carry a watch and a phone? Set the screen saver to show date and time, then you can ditch the watch.
Tip 9: Save memory when installing apps, by installing over bluetooth. This can be done using the nokia phone suite and a bluetooth serial connection. Only works with .SIS files, so java still has to be sent to the phone, but will save space when using .SIS files.
Tip 10: Operator logos
Use a filemanager like FExplorer or SeleQ to add the folders: "c:/system/Apps/phone/oplogo". Add a .bmp picture to folder "oplogo" and restart your phone! The .bmp picture size needs to be: 97 x 25 pixels
Tip 11: Check if the recepients phone is on
Delivery reports
or
Type *0# your message in the message composer window space then write your message, the recipient will not see the star zero hash bit - just the message When they read it it will relay a message back to your fone showing the time they recieved it. (haven't yet tried it myself though)
Tip 12: BlueJacking
First up, you need to know what Bluetooth is. There are lots of types of modern devices that incorporate Bluetooth as one of their many features. PDAs, mobile phones and laptops are a few of these modern devices. Bluetooth means that Bluetooth enabled devices can send things like phonebook/address book contacts, pictures & notes to other Bluetooth enabled devices wirelessly over a range of about 10 metres. So, we've got past the boring part. Now, using a phone with Bluetooth, you can create a phonebook contact and write a message, eg. 'Hello, you've been bluejacked', in the 'Name' field. Then you can search for other phones with Bluetooth and send that phonebook contact to them. On their phone, a message will popup saying "'Hello, you've been bluejacked' has just been received by Bluetooth" or something along those lines. For most 'victims' they will have no idea as to how the message appeared on their phone.
Tip 13: While you are viewing a picture in your phone's gallery, press one of these shortcut keys (definitely works on 6600, not sure about other symbians)
1 - turn image anticlockwise
3 - turn image clockwise
* - toggle on/off of full screen
5 - zoom in
0 - zoom out

Tip 14: u can select all files in a folder by selecting THE folder and copy it then paste it somewhere. however u need to make a new directory. fexplorer wun let u copy that folder together. well seleQ can mark files to copy but it really takes time!
Tip 15: Formats of images supported ones: JPG UPF GIF87a/89a WBMB MBM TIFF/F PNG EXIF
QA:
How to copy & paste text in your Nokia 3650:
Press and hold the pencil key and select your text using the scroll key.
Left function key will change to 'Copy'. Press it to copy the selected text to clipboard.
You can paste the clipboard contents the same way:
press and hold the pencil key and press 'Paste'. Or, press pencil key once and select 'Paste'.
Press and hold the Menu key to open the application switching window, where you can *duh* switch between applications.
If a program hangs and you can't shut it down, select the application in the
application switching window and press 'C' to kill it. It's also a faster way to exit programs.
Turn on/off the "click" sound made by the camera by selecting the 'Silent' profile or by turning warning tones on/off:
Menu > Profiles > "select your activated profile" > Personalise > Warning tones > On/Off.
(This also effects the sound of Java games and apps).
To change background image go to:
Menu > Tools > Settings > Phone > Standby mode > Background image > Yes > "choose an image".
The best size for background images is 174x132 pixels.
Only got blue, green and purple in your 3650 colour palette?
This free app adds 3 more colours: Palette Extender.
Display an image when someone's calling:
Menu > Contacts > "select a contact card" > Options > Edit > Options > Add thumbnail > "choose an image".
Add a personal ringing tone to a contact:
Menu > Contacts > "select a contact card" > Options > Open > Options > Ringing tone > "choose a ringing tone".
Delete all messages from your Inbox at once:
Menu > Messaging > Inbox > Options > Mark/Unmark > Mark all > Options > Delete.
Send or hide your caller ID:
Go to: Menu > Tools > Settings > Call > Send My
Caller ID > 'Yes', 'No' or 'Set By Network' to follow the default settings of your home network.
If you often copy large files to your MultiMedia Card, I recommend a card reader.
E.g. With a card reader it takes only 12 seconds to copy a 10 MB file!
Record the sound of a phone call using the (sound) Recorder:
Menu > Extra's > Recorder > Options > Record sound clip.
Note: short beeps are audible during call registration.
But there is a 60 second limitation so if you want unlimited sound recording get this app: Extended Recorder.
While writing text, press "#" to switch between upper and lower case and Dictonary on/off (predictive text input).
Press and hold "#" to switch between Alpha mode and Number mode.
Keyboard shortcuts for zooming and rotating images in Images:
1 = zoom in, 0 = zoom out, press and hold to return to the normal view.
2 = rotate anticlockwise, 9 = rotate clockwise, * = full screen.
In standby mode, press and hold the right soft key to activate voice dialling.
To add a voice tag to a phone number, open a contact card and scroll to the phone number and select:
Options > Add voice tag.
You can customize both soft keys located below the screen (in standby mode):
Menu > Tools > Settings > Phone > Standby mode > Left/Right selection key > "select an application".
In standby mode. press scroll key center (joystick) to go directly to Contacts.
In standby mode, press and hold 0 to launch your wap home page.
In Menu or any subfolder, press numbers 1 - 9 to start the application at that location.
123
456
789
In standby mode,
45# + dials the number on your sim in memory slot 45.
50# + dials slot 50 and so on.
If you have your keylock activated just press the on/off button to turn on your backlight
to look at the time when it's dark without having to unlock the keypad.
Never, ever, in your whole life, install WildSkinz on your Nokia 3650!!! WildSkinz screws up
the whole 3650 system. It was never intended to work on the 3650, only on the 7650.
Why assigning Video Recorder in the right or left soft key does not work?
(Sound Recorder is launched instead of Video Recorder)
It's a bug with firmware version 2.50.
How to check your firmware version:
A "Firmware" is the phone's operating system stored in internal Flash memory of the device (disk Z.
Manufacturers release new firmware versions containing bug fixes, improvements and - sometimes - offering new functions.
Firmware upgrade can only be made in authorized Nokia service centre (point).
To check your current firmware version simply type *#0000# on main Phone screen.
Start up in Safe Mode so no 'auto start' apps will be running:
To make sure that no memory-resident programs start when you reboot your phone,
hold down the pencil key when you turn on the phone and hold it on untill you have to enter your PIN code.
(When you have trouble booting up the phone with the MMC in it because it got corrupted for some reason, this trick will
almost always let you boot up the phone so you can remove the latest installed app which might have caused the
problem or if your phone is "unrepairable" you can still back up your important data before you do a format.)
How to totally format your Nokia 3650 and remove all installed applications, user files and restore all
settings to default like it's new out of the box? (OEM apps won't be deleted like Camera and RealOne Player).
A: First Format your MMC: Menu > Extras > Memory > Options > Format mem. card > Yes.
Note: It is very important to format your MMC before you format your phone!
Then format your phone by typing *#7370# on main Phone screen.
Phone will ask: "Restore all original phone settings? Phone will restart." Press 'Yes' and enter your Lock code (default is 12345).
Tip: Formatting takes several minutes so you'd better connect your Nokia 3650
to a charger to ensure that your battery doesn't get empty in the middle of formatting.
Note: All your created acces points and mailboxes will be lost so take a note of them. And all application settings will be reset.
E.g. In Camera, image quality is set back to normal and memory in use is set back to phone memory. And also in Messages,
memory in use is set back to phone memory, etc. Also backup your contacts with PC Suite or a program like Contacts Manager.
To reset your wallet, should you forget your code:
Type in:
*#7370925538#
this will reset the wallet code, the wallet contents will be deleted.
How to free more RAM on your phone>
Method 1: Flight mode:
Put your phone in "Flight mode" with Psiloc System Tools. Install System Tools, open it and select "Flight mode". This way you can restart the phone without your SIM card so there will be no running phone tasks in the background. Now you can have up to 3,5 MB of free RAM!
Note: ironically enough, Flight mode doesn't work when Smart Launcher is installed, at least in my case.
But i've also heard several reports of people who have both apps running without any problems.
Method 2: Smart Launcher trick:
Install Smart Launcher and open it. Go to Options, Settings and put Launcher ON.
Now plug in your charger and switch off your phone. Wait untill the battery meter appears and short press the Menu button (don't hold).
The menu should appear and now you can have 3,5 to 4,5 MB free RAM! (Hold Menu button to check RAM).
The trick is that with the charger plugged in, the phone must get a minimum software support for charging, even when
the phone is switched off. And somehow Smart Launcher has still got it's shortcut running and that's the Menu button. So when
you press the Menu button, you go directly to the Menu without any other phone tasks running in the background so
you trick the phone and you have more free RAM!
Note: when you unplug the charger, the phone will switch off.
Method 3:
It frees a little about 100~200 KB but I guess it's useful sometime. Close your menu not by selecting the right selection key "exit", or pressing the menu key another time, they only hide the menu app but do not close it, to close it select the left selection key "option" and scroll down and select "exit"
So when you open an app needs more ram reopen menu and close it, it's useful when play low bit rate video in realplayer paradis.
********************Ends********************

Sunday 22 May 2011

How to Receive Instant Free Mail to SMS Alert on Mobile When Got New EMail

You can't check every time for a new mail arrive on your mail account inbox. The limitation of gprs or internet plans, insufficient time or any other reason which limit you to check your mail time to time or continue. Here a simple way to get mail alerts on mobile for your Yahoo, Gmail or any other accounts. It'll send you a SMS alert when you have a new mail in your inbox and save your valuable time for checking webmail inbox.


Don't miss important mails just because you're away from the PC. Get SMS alerts on your mobile phone as and when the new Mail arrives. You'll receive alerts when you want them. You can link your existing Yahoo, Gmail and other email accounts and get instant Free SMS alerts for your Yahoo, Gmail accounts too.
Here some free services makes it possible. It delivers an alert on your mobile whenever an email hits your gmail or yahoo inbox. You can link your other mail accounts too. Here we have two best site for this, 1st it Way2SMS and 2nd is Site2SMS.

~Full Control of Uour Mobile Inboxes: Receive alerts for only emails that you want and when you want them. Avoid unwanted mail alerts for Spam, Promotional email Ids. You can enter those email ids, you wish NOT TO RECEIVE alerts on your mobile. Now you can receive alerts for your Gmail account too. All you have to do is Just link your Gmail account with your Way2SMS account. Way2sms mail alerts works only for mail accounts with forwarding facility. In order to get mail alerts, you have to forward a copy of your mail to way2sms mail account. Also, Way2SMS doesn't display your forwarded mails any where on way2sms.com.

Remember Yahoo account mail forwarding sends all your emails to forwarded mail account .Yahoo does not store a copy of forwarding mail. So, if you forward your yahoo mails directly to way2sms, you cannot access your mails either on yahoo or on way2sms. However you can still get mail alerts for your yahoo account by forwarding your yahoo mails first to Gmail or any other mail with forward facility and than forward to way2sms.

How to Set-up Way2SMS or Site2SMS Accounts to Get Free SMS Alert for Your Mails:
First you need to register at www.way2sms.com or www.site2sms.com if you already have an account just login. After login you need to click on "Mail Alerts" option at top in case of Way2SMS. And "Email2Sms Alerts" option in case of Site2SMS.
1. Way2SMS: After this you'll see mail alert page and option like in image below in case of Way2SMS:
Now click on "Click Here to Activate" option to setup it. In time settings select the preferred days and time to  receiving mail alerts via SMS. Now click on Continue, and than click on Activate. Now it'll activated for next 14days. After 14days you need to reschedule it.
On next page you'll see the Forwarding Settings. Here click on "Link Your Gmail account with Way2SMS mail and receive Free Email alerts on your Mobile". And note your Way2SMS mail ID, its like: 9136631@way2sms.com. Now you can use this mail Id to get free SMS alert when got an email on your mail inbox. See next stop below.

2. Site2SMS: At Email2Sms Alerts page you can activate the service and also set the Mail Alert Preferences. You can set the time settings for receiving the mails. Than just note your Site2Sms email id, its like: 919412635507@Site2Sms.Net. Now you can use this mail Id to get free SMS alert when got an email on your mail inbox. See next stop below.

How to Set-up Gmail Account with Free SMS Alert From Way2SMS or Site2SMS:
~Logon to your Gmail account
~Click on Settings & then click on 'FORWARDING/POP/IMAP' option
~Select 'Forward a copy of incoming mail to" option & Enter your Way2SMS or Site2SMS Email ID which you'll got when register at Way2SMS or Site2SMS, its like: 9136631@way2sms.com.
~Gmail will sends a verification code to 9136631@way2sms.com.
~You can check confirmation code at Way2SMS setting page or You will receive gmail confirmation mail alert on your mobile register with Way2SMS with subject line containing confirmation code.
~Enter the verification code in Gmail verification box. Click On Verfy.
~Finished. You will now receive alerts for every incoming mail that arrives in your gmail id.
~You can filter alerts by choosing which emails you want to alert, and when you want to receive them.

How to Set-up Yahoo Mail Account with Free SMS Alert From Way2SMS or Site2SMS:
~Logon to your Yahoo mail account
~Click on Options  & then click on 'Mail Options'
~Select 'POP & Forwarding" option & then Click on 'Setup or Edit POP & Forwarding' link.
~Choose 'Forwarding' option & Enter your Gmail id or any other mail id with Forward facility.
~Go to your forwarded account, Forward mails to "9136631@way2sms.com"
~Done. You will receive alerts for your yahoo.co.in mail account.

How to Set-up Other Mail Accounts with Free SMS Alert From Way2SMS or Site2SMS:
~All you have to do is Just forward a copy of your mail to your Way2SMS or Site2SMS Mail Id like: 9136631@way2sms.com". That's it.
~Your Mail account may send Verification code to 9136631@way2sms.com.
~Check your SMS received on your registered mobile.
~You will now receive alerts for every mail that arrives in your company mail inbox.

Now you are free from checking your mail accounts every time to see if a new mail arrived or not. Just got free SMS alert for every new mail you receive in your web mail account. And same time you can also enjoy free SMS service from above mention sites i.e. Way2SMS or Site2SMS.